I have always wanted to have a window seat or a nook somewhere in my house. I had pictured building one many times over in some future master bedroom of mine, or since Diva is an avid reader, I also thought one in her bedroom would also be awesome. I could just picture her curled up in one with one of her books on a rainy afternoon, but I never had the time or ability to build one, so I kind of forgot about it.
...until I was cleaning out the "catch-all" room down stairs in order to build Diva's "Dance Studio" room.

As I looked at all the crap crammed in the closet, I realized that it was a perfect place to create that nook that I had always wanted. A closet wasn't terribly necessary in this room, anyway and it would also be a great seating area for me when I watched her practice (I've been kicked and hit with props more time than I care to admit). I quickly came up with a picture in my head of how I wanted it to look, but the key was getting it to turn out like that picture. Well, after some much appreciated help from my dad, we were able to pull it off and it turned out totally fantabulous!


1. The first thing we did was to frame out the bottom on all 4 sides with 2X4's.


 .
.


Linked up to:


...until I was cleaning out the "catch-all" room down stairs in order to build Diva's "Dance Studio" room.

As I looked at all the crap crammed in the closet, I realized that it was a perfect place to create that nook that I had always wanted. A closet wasn't terribly necessary in this room, anyway and it would also be a great seating area for me when I watched her practice (I've been kicked and hit with props more time than I care to admit). I quickly came up with a picture in my head of how I wanted it to look, but the key was getting it to turn out like that picture. Well, after some much appreciated help from my dad, we were able to pull it off and it turned out totally fantabulous!


Doesn't it look cozy? I totally love it!
I'll explain the process the best I can (with a few more pictures):
Obviously, the first step was to clean out all of the crap in the closet!!

After I did that, I started by taking the screws out of the rod and beating the crap out of the shelf, when it didn't come loose enough, I had studly use his man power to do the rest. Originally, we left the 1x2's attached to the wall because we were thinking it would save a little money by serving as a "chair rail" for the bead board we planned on putting up.
Then it was time to start the build.
1. The first thing we did was to frame out the bottom on all 4 sides with 2X4's.

We used basic corner L brackets on them and we also braced it across the middle length-wise with another 2X4 to help it hold future weight.
2. Then, we cut a sheet of MDF to fit the closet (We had to use two pieces because we bought the 4 foot length so it would fit into our Pilot.). We put the MDF over the 2X4's and painted everything white.
(which, in retrospect, we didn't really need to, but at the time I was still debating on if I wanted to keep the part under the bench as open storage).
(which, in retrospect, we didn't really need to, but at the time I was still debating on if I wanted to keep the part under the bench as open storage).

3. After we finished with the bottom of the frame, we took 4X4 pieces of bead board and hung them to the height we wanted, being careful to make sure that the top part of the bench would cover the bottom of the board. It saved us from having to install it with a bench in the way later. This time we didn't use liquid nails, like we did for the faux brick wall. We just used finishing nails, which looked really obvious (and scary) before I covered them up with painter's putty and primer.


4. With the bead board hung, we made sure to caulk where all of the seams met between panels, in all of the corners, and both under and above the trim that we used on top of it (the existing board was scrapped and replaced with molding, which looked MUCH nicer). If you don't do the caulking, it looks crappy after you paint it, so spring for the caulk for a couple bucks. We used a multi-purpose silicone based caulk. It will say on the bottle if it works for trim and walls.
5. My dad kind of took over from there as far as building the bench. To frame the top of it he used 2X4's doubled up (with one of them tripled in the back side ) and nailed them together instead of brackets. Apparently, it makes it more sturdy this way.
 |
| Destructo really wanted to help, so papa gave him a board with a nail in it, a small hammer and told him to try to get it through the concrete. It kept him busy for a while. |
 |
| Here you can see how he doubled up the 2X4's on the two cross braces. (with three on the back side). |
After the framing for the top of the bench was finished, we had a decision to make...Should we make it so the storage was open underneath the bench? Should we put doors on the front, so it was closed?
Ultimately, we decided just to close off the front and cover it with bead board when my dad suggested we build the bench so it opened from the top, like a toy box, allowing for storage underneath without the hassle of building doors, or the mess that can be created with open storage and kids not putting stuff away (this is where the third 2X4 on the back came in).
Ultimately, we decided just to close off the front and cover it with bead board when my dad suggested we build the bench so it opened from the top, like a toy box, allowing for storage underneath without the hassle of building doors, or the mess that can be created with open storage and kids not putting stuff away (this is where the third 2X4 on the back came in).
 .
.
6. After the top of the bench frame was finished, we cut some particle board, instead of MDF, into 3 separate pieces to make the lid for the storage area.
***Why not continue with the MDF? Well, because my dad HATES MDF and prefers particle board if there is no way you can construct something without real wood. He says it's "cancer causing sh*t" and is way too messy to cut. Particle board is cheaper and lighter than MDF anyway, so I guess we will try to use that from now on, unless my dad can convince his cheap daughter to use real wood instead of fake crap in the future.(his words, not mine.)
Anywhooo...Moving on...
 |
| My dad's other special helper, Harley our German Shepherd. |
 |
| We haven't attached hinges to the lid, yet because we want to make sure that fingers can't be cut off in the process of opening and closing it. I will let you know what we end up deciding. |

7.After we got to this part, we started on the cornice and curtains above the closet.
It was really coming together except for a few finishing touches...

It needed a cushion of course, which I made out of some fabric and a 2 inch foam cushion I got from Hobby Lobby on sale. I did it "Jen Style" by using a glue gun and some spray adhesive for extra reinforcement to secure the fabric to the back of the foam. It was quick and easy...but not completely perfect....It's a good thing that the bench cushion was partially covered by the molding on the bench and that I could also tuck in any loose material into the crack between it and the walls.
I finished accessorizing the nook by adding some coordinating pillows, a chandelier that I got from Hobby Lobby and a board I had painted and added some vinyl lettering to.
Here is what it looks like in the finished dance room:

Here is what it looks like in the finished dance room:


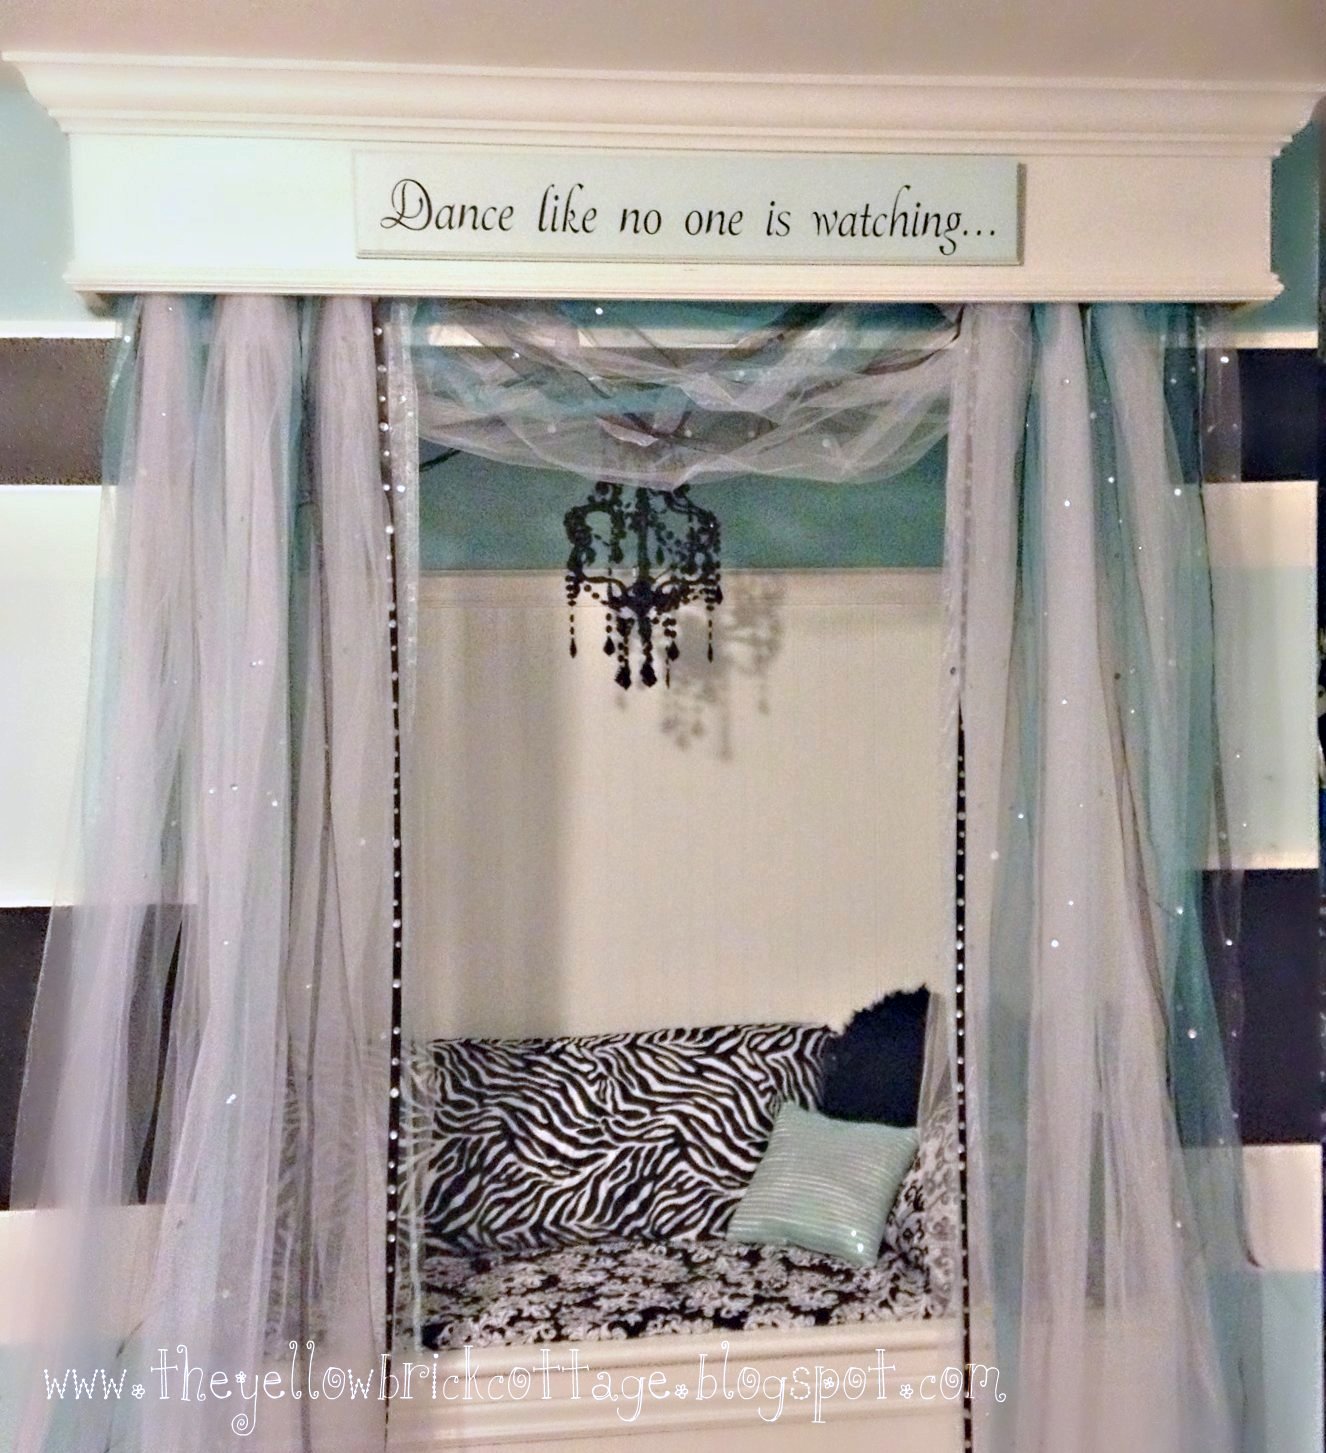

There you have it. I finally got the nook I always wanted...and Diva thinks it's pretty darn cool, too!
It looks super darling!
ReplyDelete